Showing posts with label Get Your Craft On. Show all posts

Sunday, March 25, 2012

earrings on a cheese grater.


okay, i realize i might be a little late on this and that these have been on the scene for a bit now, but I just learned how to make an earring holder out of a cheese grater. who knew?!

you simply take a cheese grater and some spray paint and you're good to go. i gave it two coats, letting the paint dry in between each one. i also gave it an extra touch by wrapping some jute string around the handle using a glue gun to secure it.


and if you want to give it an extra touch of cuteness, have your husband dig through his tool box in the garage and find some wire and have him cut it and then bend it so that it has these creative little curly things at the end of it and then do the easy part yourself of gluing them to your cheese grater.

super easy, super cute!

Wednesday, February 2, 2011

2011 Valentine Decorating

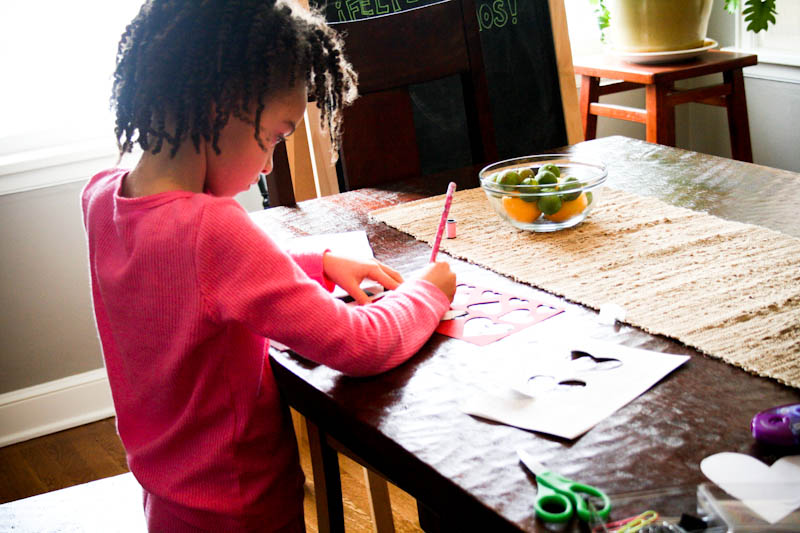
I have never really gotten into present buying or decorating for Valentines Day. I'm not sure why. But this year is different. I think it's a direct result from working at Paper Source and being inspired to create something every time I step foot in there. I even have gifts bought for my kids way ahead of schedule. Again...Paper Source. Maleah got in on the fun of helping mom make some Valentine crafts for the house.

You know me, I keep things pretty simple. We cut lots of heart shapes out. Look at the concentration.


The hearts were made from some cute Valentine wrapping paper found in Target's dollar section and also from pages of a book. We taped a piece of pink thread in between two hearts in a dangly sort of way.


And then I hung a bunch of them from my chandelier in my dining room.


I also made a larger heart made from the paper of a book. I can't get enough of this look. I taped two of them together, punched a hole in the middle of it to hang up with the pink thread and gave it a little bling, which consisted of a little flower made of wrapping paper pieces I cut out and glitter glue in the middle.


We also put up some fun heart decals in the windows (sorry, no picture) and a string of heart lights all found, where else, in Target's dollar section! I love shopping that section of the store. You just can't beat the low cost of such cute things. Now I just need to figure out what to buy Mike for Valentines Day that fits our budget, that shows him how much I love him, and that is something he will really like. Now there's a challenge!

Wednesday, November 24, 2010

Christmas Craft

So, I was reading my friend's blog today and and totally got inspired to get my craft on. She showed how to make a super cute bird ornament. As most of you know, I LOVE the whole bird theme...still. I even shucked my housework duties to run right out to Michaels and get my supplies. This project was super easy and inexpensive and I absolutely love the way it turned out.


If you want to know how to do it, check out Jami's blog at www.thenatos.blogspot.com. I also made glitter pinecones (glue and glitter on tips of pinecones). How fun!


I'm officially getting into the Christmas spirit and I am planning on doing plenty more Christmas crafts. So stay tuned...

Friday, September 17, 2010

Organized Craft Closet

We have been in our new house for about four months now, and, of course, there are a gazillion different projects I am wanting to tackle. You see, I have this thing in me where I can't rest or feel "complete" unless I have done something during the course of the day that has to do with cooking, cleaning or organizing. Maybe that's OCD. I don't know. Anyway, we have a closet in our dining room that I have designated for Maleah's crafts, such as paints, crayons, papers and any of her "artsy" things. This closet has taken a back burner to getting other things put away and organized, but I finally got tired of Maleah not being able to find the things that she really enjoys doing. So I got busy. Here is a before shot of the closet. I forgot to take a picture of the closet with everything in it. Believe me, it was a mess. Everything was just thrown in there.

I pulled everything out.


I painted the inside of the closet (okay, my husband painted it) and hung up a couple of shelves (again...husband). And that's pretty much it.


I am thinking about adding some fun decals or painting something on the inside of the closet door, but for now, this is good. Now Maleah is able to go into "her" closet and get what she is needing without digging under a bunch of boxes and papers and I can feel good about completing another project. Yay!

Monday, August 30, 2010

Elephant Onesie

After seeing my friend Jami blog about this craft, I knew I had to take a stab at it. It's so cute and easy, not to mention, it's the perfect gift for a new mom. I LOVE looking at fabric. All of the colors and patterns makes me, well, happy. So I thoroughly enjoyed going to the fabric store and picking out fabric for this project.


I googled an elephant template which, of course, brought up several. Pick your favorite. You will then need to use "Heat and Bond" or "Steam a Seam", which you can get at your local craft store, and follow the directions. This will make your fabric stick to your piece of clothing. And if you want to take it a step further and make it even cuter, if that's even possible, you can get out your sewing machine and sew around the edges. If your like me and start to have a panick attack even thinking about operating a sewing machine, just make a nice hand stitch around the edges. I think that's much quicker and easier anyway.


You can really get creative with this project because of all the choices of fabrics and patterns to choose from. And people will love the fact that it's handmade!

Tuesday, June 15, 2010

Shelf makeover.

I redid a shelf for Maleah's room when she was a baby. It was an unfinished wood piece that I got at Michael's and I painted it a "country" green when "country" green was in.

Now, six years later, it's not workin' so well. I am over-way over-the country green look. I was going to get rid of it, but I reminded myself that almost everything is salvageable and almost everything can look brand new with a coat of spray paint. I also remembered I had a super cute folder that I got at Target a while back. I didn't know what I was going to do with it but I knew I would someday use it in Maleah's room because the colors matched and it had birds and owls on it. Actually, the bird and owl thing is not restricted to Maleah's room. I am addicted to both and will use them anywhere and everywhere. So this is what I came up with. I spray painted the shelf with Rustoleum's Ultra Cover spray paint in Blossom White.


I then cut a few of the square pictures out of the folder and put Mod Podge on the back of each one and glued them onto the shelf. I also put a little Mod Podge on top of the squares.


And that's it. Quick and easy. Just the way I like it.

Saturday, May 29, 2010

Blue window.

The color turquoise. It's EVERYWHERE. People are going crazy for this color-including me! I have decided to do lime green and turquoise in my living room, so my new fireplace mantel addition seems to fit nicely. Awhile back I found several old windows on the side of the road. I was thrilled that I was able to find them for free. People actually pay pretty good money for these things at flea markets. Anyway, I took it home, painted it using acrylic craft paint in turquoise and then sanded it like crazy. It gives a nice pop to the mantel. Not sure if I want to add anything to the mantel or not. Also not sure if I'm set on the dark wood candle holders. I'll give it a couple of days (more like a few hours) to see what I think.

Sunday, April 18, 2010

Desk redo

Awhile back I got this great little desk at a garage sale for Maleah. We use it occasionally for when we homeschool. I have been wanting to "cheer it up" a bit since it was rather plain. So, here is what I came up with.

This picture was taken right after I put the primer on. I apologize for the bad lighting. It was dark outside.


I lightly sanded the desk and then applied primer. I then painted the whole thing with folkArt acrylic paint. The kind that comes in those little bottles for around $1 at a craft store. The color is Jamaican Sea. I had some fun wrapping paper that matched perfectly so I Mod Podged that to the top, although, that is where things got REALLY tricky. I put the glue on the desk top first and then carefully laid the paper on top. It bubbled up and wrinkled pretty badly. I waited until the next day to see if it got any better after drying. Of course it didn't, so I had to take it off, which was not an easy task. I tried it again, only this time I used a little less glue on the top of the desk and laid the paper down more slowly, starting from the top and working my way down to the bottom. It still bubbled and wrinkled a little but nothing I can't live with. I realized it's the paper. I think scrapbook paper is much easier to work with because it's thicker and not as flimsy as wrapping paper. After getting the paper on top I Mod Podged twice (letting it dry in between coats) over the whole desk, including on top of the paper, to create a nice sealer.

Here is the finished product. I love how bright and cheery it looks, and even better, Maleah loves it!