Friday, December 3, 2010

Christmas Decorating 2010

I learned something about myself while decorating for Christmas this year. When it comes to decorating I am a minimalist. (I think that applies to a lot of other areas in my life as well). The less the better. If I start accumulating too much "stuff" I feel unbalanced. That goes for having too much going on my life too. Anyway, I have quite a few decorations that I have used over the years, but they just didn't seem to fit our new home. They are mostly red and green and countryish, so I didn't use them, except for the ornaments on the tree. I couldn't change those up. Too many memories. Ya know, the ones that your kids make you in preschool and kindergarten that only you yourself could love and appreciate.


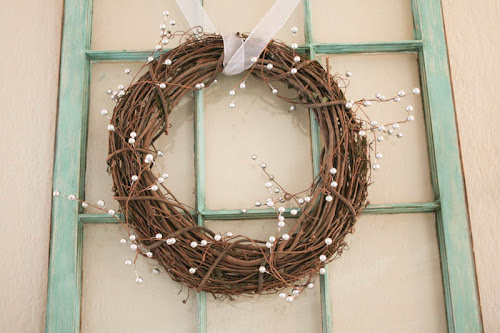
But for the rest of the house I did very little. I'm loving all things silver this year so that's basically the color I used most. My wreath that I put above the fireplace was super simple and inexpensive. I bought a grapevine wreath for $3.99 and wrapped garland around it, which was only $3.50. And then I draped some garland on the ledge above the fireplace. I will also put up Christmas stockings but haven't bought them yet.


And then there is my little tree I put on our dining room table. You can't really call it a tree. Mike chopped off a branch from a tree in our front yard and I stuck it in some pebbles in a glass jar. I hung my handmade ornaments on it.


And that's really it. I will probably put a few more things up here and there, but I am definitely keeping it minimal. I need it like it that way.

Saturday, November 27, 2010

Thanksgiving 2010

Had a wonderful Thanksgiving. This year felt a little extra special since this was our first Thanksgiving in our new home. I love knowing that we are making new memories in this house. It was a pretty low key day. Just Mike and I the kids and my mom. Mom kept me company in the kitchen while I cooked the dinner. Yes, she offered several times to help, but, of course, I had to do it all myself. Ya know, MY way. But I really do enjoy cooking so it was all good. Sharing good conversation and a good glass of wine was all I needed to keep me going. Thanks, mom!


Jarod, Maleah and my mom were getting their groove on in the kitchen to Christmas oldies. Jarod would pick out a Christmas song from Chris Brown (look it up if you're not in the know) and mom would pick out the Temptations. Can we say generation gap?!


And here I am stuffing my bird. I used an awesome recipe from Giada De Laurentiis of the Food Network. The recipe is here. It was super yummy!


And what would the holiday season be without a picture of your honey next to the fireplace.


As a lot of you know, this has been a tough year on the homefront, but I am so grateful for the Lord's faithfulness and provision. I can look back and see just how far God has brought me and just how much He really is at work in my life. I'm a blessed woman!

Wednesday, November 24, 2010

Christmas Craft

So, I was reading my friend's blog today and and totally got inspired to get my craft on. She showed how to make a super cute bird ornament. As most of you know, I LOVE the whole bird theme...still. I even shucked my housework duties to run right out to Michaels and get my supplies. This project was super easy and inexpensive and I absolutely love the way it turned out.


If you want to know how to do it, check out Jami's blog at www.thenatos.blogspot.com. I also made glitter pinecones (glue and glitter on tips of pinecones). How fun!


I'm officially getting into the Christmas spirit and I am planning on doing plenty more Christmas crafts. So stay tuned...

Wednesday, November 17, 2010

Working Again.

I have not worked in 7+ years. That is so hard for me to believe. I used to work my tail off back in the day and knew no other way. I was a single mom raising Jarod and was the sole bread winner. I always dreamed of being a stay at home mom. That is why I am so grateful I married someone that has strongly supported me in being able to stay at home. If it wasn't for all of his hard work I wouldn't have been able to do it. Thanks babe!

BUT, things have changed. Jarod is soon to be out of the house (sniffle sniffle) and Maleah is in school all day. It made me have to think about what I want to do with myself. What do I like to do? What is my passion? Who the heck am I? Yeah, there has been some serious soul searching goin' on in my world. Soooo, I decided to get a job. Not only for the money, which is pretty much needed these days, but for myself. I decided since I love to be creative and get my craft on, I got me a job at Paper Source.


Now, for those of you that don't know what Paper Source is, shame on you! Get to your nearest one and check it out. It's such a great place. They have everything you can think of having to do with paper, and then some. You can get holiday and birthday cards there, your wedding invitations, gift wrap, etc. Or make your own cards. Christmas is around the corner. They have all the supplies you'll need and our staff can give you easy and fun ideas to make them. They also have fun, quirky gift items that are hard to find. Or you can go to one of their workshops that teach you how to do all kinds of fun, crafty things. I am learning new things every time I go to work and I love it.

Here is their website:
www.paper-source.com

If you have been wanting to be more "crafty" but have felt like you don't have what it takes, stop thinking that! You do have what it takes. It's not hard. Everybody possesses creativity within them. Tap into it people! And get to your nearest Paper Source for inspiration and guidance.

Monday, October 11, 2010

Learning Photography

One of my favorite things to do is read blogs, and I realized that one of the things I enjoy most about a good blog is its pictures. But not just any pictures. I'm talking about the pictures that pop out of the computer screen with vibrancy, telling you a story. I came to the conclusion that the person behind those pictures actually knows what they are doing when it comes to photography, and that they probably have a nice camera. And they probably have a good editing software. So, I decided to teach myself photography. And let me tell ya, it is not an easy feat, people-but I am enjoying it immensely. I have been reading a few really good books, spending tons of time on the internet (thank God for youtube tutorials) and practicing, practicing, practicing. I am fortunate enough that my son took photography classes and invested in a really good camera (Canon Rebel xti) a while back. He has been so gracious and kind to let his dear mother (who can't afford this camera) to use it like it's her own.

I took a few shots this past weekend of Mike and Maleah at the park for practice. Now, I will tell you, I did not have the intentions of sharing these pictures with the world. And I am certainly not sharing them because I think they are of a professional stature. I have a whole lotta learnin' to do still. I'm just kinda proud of the way they turned out given three weeks ago I hardly knew anything about photography. I'm looking forward to learning lots more!


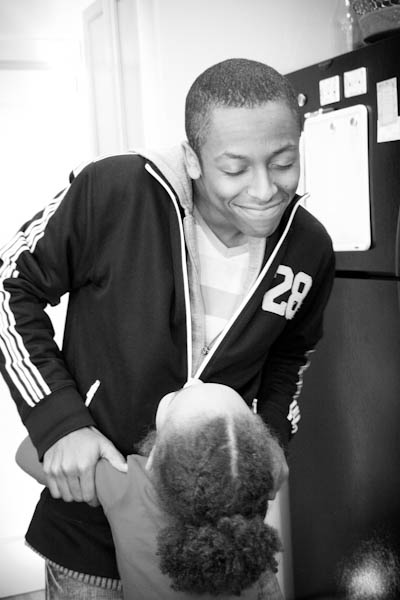
And here is a couple of pictures I took of Jarod. He was actually teaching me how to shoot in manual mode. Whew! It's like riding a bicycle for the first time without the training wheels. Thank you, son, for your patience with your mother. I know it can be challenging.


Friday, September 17, 2010

Organized Craft Closet

We have been in our new house for about four months now, and, of course, there are a gazillion different projects I am wanting to tackle. You see, I have this thing in me where I can't rest or feel "complete" unless I have done something during the course of the day that has to do with cooking, cleaning or organizing. Maybe that's OCD. I don't know. Anyway, we have a closet in our dining room that I have designated for Maleah's crafts, such as paints, crayons, papers and any of her "artsy" things. This closet has taken a back burner to getting other things put away and organized, but I finally got tired of Maleah not being able to find the things that she really enjoys doing. So I got busy. Here is a before shot of the closet. I forgot to take a picture of the closet with everything in it. Believe me, it was a mess. Everything was just thrown in there.

I pulled everything out.


I painted the inside of the closet (okay, my husband painted it) and hung up a couple of shelves (again...husband). And that's pretty much it.


I am thinking about adding some fun decals or painting something on the inside of the closet door, but for now, this is good. Now Maleah is able to go into "her" closet and get what she is needing without digging under a bunch of boxes and papers and I can feel good about completing another project. Yay!

Monday, August 30, 2010

Elephant Onesie

After seeing my friend Jami blog about this craft, I knew I had to take a stab at it. It's so cute and easy, not to mention, it's the perfect gift for a new mom. I LOVE looking at fabric. All of the colors and patterns makes me, well, happy. So I thoroughly enjoyed going to the fabric store and picking out fabric for this project.


I googled an elephant template which, of course, brought up several. Pick your favorite. You will then need to use "Heat and Bond" or "Steam a Seam", which you can get at your local craft store, and follow the directions. This will make your fabric stick to your piece of clothing. And if you want to take it a step further and make it even cuter, if that's even possible, you can get out your sewing machine and sew around the edges. If your like me and start to have a panick attack even thinking about operating a sewing machine, just make a nice hand stitch around the edges. I think that's much quicker and easier anyway.


You can really get creative with this project because of all the choices of fabrics and patterns to choose from. And people will love the fact that it's handmade!

Tuesday, June 15, 2010

Shelf makeover.

I redid a shelf for Maleah's room when she was a baby. It was an unfinished wood piece that I got at Michael's and I painted it a "country" green when "country" green was in.

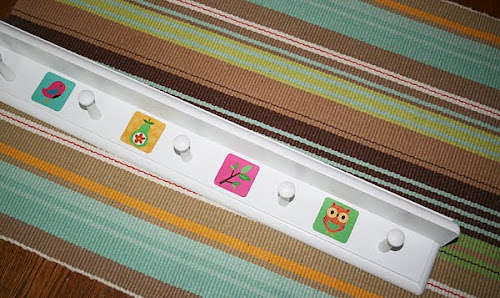
Now, six years later, it's not workin' so well. I am over-way over-the country green look. I was going to get rid of it, but I reminded myself that almost everything is salvageable and almost everything can look brand new with a coat of spray paint. I also remembered I had a super cute folder that I got at Target a while back. I didn't know what I was going to do with it but I knew I would someday use it in Maleah's room because the colors matched and it had birds and owls on it. Actually, the bird and owl thing is not restricted to Maleah's room. I am addicted to both and will use them anywhere and everywhere. So this is what I came up with. I spray painted the shelf with Rustoleum's Ultra Cover spray paint in Blossom White.


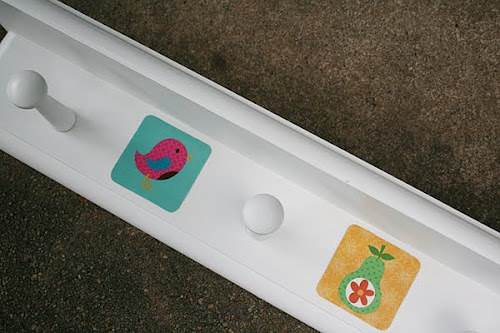
I then cut a few of the square pictures out of the folder and put Mod Podge on the back of each one and glued them onto the shelf. I also put a little Mod Podge on top of the squares.


And that's it. Quick and easy. Just the way I like it.

Saturday, May 29, 2010

Blue window.

The color turquoise. It's EVERYWHERE. People are going crazy for this color-including me! I have decided to do lime green and turquoise in my living room, so my new fireplace mantel addition seems to fit nicely. Awhile back I found several old windows on the side of the road. I was thrilled that I was able to find them for free. People actually pay pretty good money for these things at flea markets. Anyway, I took it home, painted it using acrylic craft paint in turquoise and then sanded it like crazy. It gives a nice pop to the mantel. Not sure if I want to add anything to the mantel or not. Also not sure if I'm set on the dark wood candle holders. I'll give it a couple of days (more like a few hours) to see what I think.

Thursday, May 27, 2010

Maleah's first tooth.

Maleah had been patiently waiting for one of her teeth to become loose. A lot of her friends have been losing teeth and she kept asking when she will lose one of hers. A couple of weeks ago she said that one of her teeth was loose. I felt it, and sure enough, it was. Needless to say, she was extremely excited and she kept asking me every hour (s0 it seemed) if it felt like it was getting looser. We were riding in the car yesterday and she kept messing with it until it was hanging by a thread. I told her to stop messing with it because I had one more stop to make before getting home and I didn't want the tooth to come out until we got home. So, we were walking around T.J. Maxx (love that place) and all of sudden the tooth literally falls out of her mouth and she catches it! We promptly headed to the bathroom to wrap the tooth in toilet paper. I think this is the proudest I have ever seen my daughter . She was grinning from ear to ear. She proudly announced that she is a big girl now because she has a missing tooth, and, of course, I congratulated her.


That night, we wrapped the tooth in some toilet paper and placed it under her pillow for the tooth fairy. This is what she found when she woke up. A note from the tooth fairy (aka daddy) along with 50 cents.


The next morning I was still sleeping when she busted into my bedroom to show me what the tooth fairy had left her. I started cracking up. On the side of her face, by her temple, there were two red outlines left from the two quarters she had slept on. She had woke up very early and found the note and money and then had went back to sleep before coming to tell me about them. After I showed her the marks on her face she started laughing and said, "I was wondering where that money went." Silly girl!

Sunday, April 25, 2010

My princess turns 6.

It really amazes me how quickly time flies; especially when you are watching your children grow up. It's hard to believe Maleah is turning 6. She is slowly getting out of the "little girl" stage and becoming a "big girl".

We started her birthday party out at Kaleidoscope, which is such a fun place for kids to get their creative energies flowin'. They get to make whatever their imaginations can think up using paper, markers, paints, fun cut outs and all kinds of crafty things. It's owned by Hallmark, so all of the materials are from Hallmark's discard or overstock. We then headed over to crown center to enjoy D'Bronx pizza (my fave), cupcakes and present opening. We had such a good time. And I have to say--bragging really--that my friends have some of the cutest darn kids ever. A big thanks to all of you who came to Maleah's party despite the down pouring of rain and the crazy crowds. It was worth it!

Sunday, April 18, 2010

Desk redo

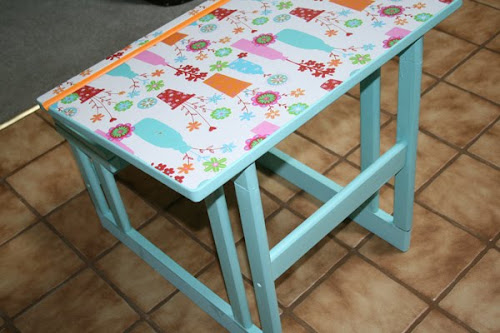
Awhile back I got this great little desk at a garage sale for Maleah. We use it occasionally for when we homeschool. I have been wanting to "cheer it up" a bit since it was rather plain. So, here is what I came up with.

This picture was taken right after I put the primer on. I apologize for the bad lighting. It was dark outside.


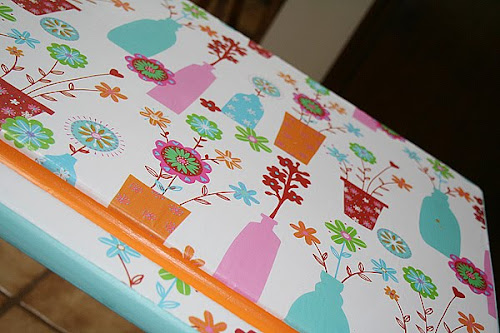
I lightly sanded the desk and then applied primer. I then painted the whole thing with folkArt acrylic paint. The kind that comes in those little bottles for around $1 at a craft store. The color is Jamaican Sea. I had some fun wrapping paper that matched perfectly so I Mod Podged that to the top, although, that is where things got REALLY tricky. I put the glue on the desk top first and then carefully laid the paper on top. It bubbled up and wrinkled pretty badly. I waited until the next day to see if it got any better after drying. Of course it didn't, so I had to take it off, which was not an easy task. I tried it again, only this time I used a little less glue on the top of the desk and laid the paper down more slowly, starting from the top and working my way down to the bottom. It still bubbled and wrinkled a little but nothing I can't live with. I realized it's the paper. I think scrapbook paper is much easier to work with because it's thicker and not as flimsy as wrapping paper. After getting the paper on top I Mod Podged twice (letting it dry in between coats) over the whole desk, including on top of the paper, to create a nice sealer.

Here is the finished product. I love how bright and cheery it looks, and even better, Maleah loves it!


Friday, April 9, 2010

Stink be gone.

One of the biggest complaints I hear among people (including myself) who use all natural skincare products, you know, the ones without all the nasty chemicals, is that they can't find a natural deodorant that actually works. It's so frustrating. I have been using the Crystal stick for a few years now, which gets me by, but it doesn't work as well as I'd like. Wetness and odor still rear their ugly heads at times. And I refuse to go back to using the conventional kind because of the horrible ingredients that are used in them, namely aluminum. Here are some quick facts about
Aluminum.

1. Aluminum may impact breast cancer risks.

2. Aluminum mimics estrogen.
3. Aluminum is linked to Alzheimer’s.

Yikes! No thanks. That's why I'm so thankful that I found something that actually works. And not only did I find something that works I whipped it up right in my own kitchen with only four ingredients. Here's the recipe:

1/4 cup baking soda
1/4 cup of arrowroot powder
4 Tbs. melted coconut oil
10 drops of essential oil (I used Lavender but Grapefruit would be luscious too)

Mix the baking soda and arrowroot powder together. Then add the coconut oil and essential oil to this mixture with a fork, stirring until you get a creamy consistency. Put into a glass container such as a baby food jar or something of that nature. Let the mixture firm up a bit by leaving it sit on the counter (which works in the colder seasons) or place in fridge for a few minutes. To apply, just scoop up a bit on your fingers and and place on the skin to let it melt and then rub it around.

This stuff really works! It even feels like regular deodorant. And I love how it smells.

Here's to no more stinky pits!


Sunday, April 4, 2010

Easter 2010

Today was a very relaxing Easter for us. We went to church and heard a good message and then hung out with awesome friends. I'm so grateful we don't have to walk out this journey called life alone.

We started out with lunch in the back yard...
and what would Sunday brunch be without Mimosas?

we then hid eggs for the girls to find. The dads hid the eggs so they were found rather quickly.


we ended our day with a 2.5 mile walk on the walking trail. What a great way to celebrate the Resurrection of our Lord!


here are a few pics we took before church: